

You place a dark shade at the outer corner, blend the edge, and notice a pale gap beside a concentrated patch of color. More blending seems to make both problems worse. Patchy eyeshadow can result from an uneven base, too much color at once, brush pressure, repeated blending, or the way a particular formula works in your routine. A more even result starts with identifying what you see, then adjusting one part of the application.
This guide focuses on powder eyeshadow, especially mattes. Cream, liquid, and reflective formulas can need different handling, so follow their application directions rather than assuming one technique suits every texture.
1. Is It Patchiness, a Harsh Edge, or Muddy Color?
These problems can appear together, but they call for different adjustments. Patchiness means unwanted variations within an area that you intended to color evenly. A harsh edge is an abrupt boundary around otherwise even color. Muddy color means the shades have merged until their intended contrast is difficult to see.
Before adding anything, check the area with your eye relaxed and then open. Notice whether color is missing inside the shape, concentrated at its boundary, or spread farther than intended.
| What you see | What to check first |
|---|---|
| Light gaps beside darker patches | Base evenness, initial product amount, and whether blending has lifted color |
| An obvious line around even color | Whether only the boundary needs softening |
| Several shades becoming one indistinct color | Whether a loaded brush is moving dark pigment through lighter areas |
| A crease or fading that appears later | Wear conditions and product gathering, rather than application alone |
L’Oréal Paris’s eyeshadow guide distinguishes insufficient blending from over-blending and recommends working at the edges with light pressure. The table above is an observation aid, not a way to diagnose a formula from appearance alone.

2. What Can Make Eyeshadow Apply Unevenly?
An Uneven or Overloaded Base
The surface beneath the shadow affects how easily you can place and move the color. If your base is thicker in one area, you have an uneven starting point. Adding more primer over the whole lid does not necessarily correct that difference.
Follow the base product’s directions and distribute a modest amount evenly. If you use concealer underneath, consider whether that extra layer helps your particular routine before adding primer and powder as well.
Setting the base with powder is an option to compare, not a universal requirement. In her matte eyeshadow tutorial, Christine at Temptalia describes how powder over a tackier base can make blending easier, but can also reduce adhesion or make some shadows look faded. That is practical experience with different products, rather than proof that every base should be set.
Too Much Color in the First Layer
A heavy first deposit leaves you trying to soften a concentrated area while keeping the surrounding skin lighter. For example, imagine placing a large amount of deep brown at the outer corner: spreading it farther may enlarge the dark shape without producing the gradient you wanted.
Begin with less color than you expect to need and build where additional depth is useful. L’Oréal Paris’s guide recommends thin layers and identifies excessive initial application as a contributor to patchiness. This gives you more opportunities to check placement before the shape becomes difficult to adjust.
Brush Buildup, Heavy Pressure, and Repeated Blending
A brush carrying dark pigment keeps adding color even when you intend only to soften an edge. A clean brush makes it easier to distinguish the effect of blending from the effect of depositing more product.
Pressure matters too. If you repeatedly scrub across the same spot, the color may become less even instead of more diffused. L’Oréal Paris recommends gentle movements at the boundaries; Temptalia also describes bare-looking spots and muddiness after excessive blending. Check the result between short passes rather than continuing until all contrast disappears.
Differences Between Shades and Formulas
Do not assume every shade in a palette will behave identically. Try the specific shade that gives you trouble under comparable conditions, rather than judging the entire palette from one easy-to-use neutral.
Also separate the job from the texture. Diffusing a powder matte, pressing on a reflective accent, and blending a drying liquid are different tasks. NYX’s application guide distinguishes powder, cream, and liquid formulas and notes that liquids tend to dry quickly. Advice to keep sweeping a powder edge should not automatically be applied to a liquid that has already set.
3. How to Build Color and Blend the Edges More Evenly
A useful sequence separates placing pigment from softening its perimeter. You can change the order of shades to suit your look, but you do not need to move every shade across the entire lid.
- Prepare an even base. Follow its directions, distribute it thinly, and check for obvious gathering before adding shadow.
- Place a small amount of color. Choose a brush suited to the area and begin where you want that shade to be most visible. Check the deposit before picking up more.
- Soften the meeting point. With a clean, appropriately sized blending brush, use light, short movements where the color meets bare-looking skin or another shade.
- Add depth locally. Return to the area that needs more color rather than sweeping a fresh load through the entire transition.
- Stop and assess. Look at the gradient with your eyes open. If the edge is soft and the depth remains where you intended, further blending may add little.
NYX’s guide supports controlled pickup and gradual application in its beginner tutorial. For a reflective lid accent, gentle pressing within a smaller area may be more useful than repeatedly sweeping it into the surrounding matte. Follow the shadow’s directions for the applicator and any permitted wet use.
4. How to Fix a Patch Without Reworking the Whole Eye
If the Edge Is Too Dark or Harsh
Stop adding dark shadow. Use a clean brush to work just along the boundary with light pressure, checking whether the edge softens without expanding the shape.
If the dark area is already much larger than intended, blending it farther is unlikely to make it smaller. A limited cleanup may be more practical than adding lighter and darker shades repeatedly.
If Color Has Lifted From a Small Area
Try placing a small amount of the same shade directly into the gap with a suitable application brush. Check whether it adheres before touching the perimeter.
If it stays in place, soften only the small join that needs attention. If it lifts again, adding several more layers may simply create a thicker uneven area. Treat that as a reason to reassess the base or reset the spot, rather than a signal to press harder.
When a Local Reset Makes More Sense
A local restart is worth considering when the surface looks heavily layered, the same gap keeps returning, or gentle correction no longer changes the result.
Remove makeup from the affected area with a product suitable for the eye area, following its directions. Clear any remaining remover as directed and prepare the area again before applying fresh color. Do not keep rubbing if the skin becomes uncomfortable; a makeup correction is not a reason to continue through irritation.
5. How to Tell What Needs Changing in Your Routine
Make the next attempt informative. If you replace the primer, brush, palette, and application method together, you will not know which change made the difference.
Start with a clean brush in good condition and keep the shade and prepared base consistent. Try a smaller amount first. On another occasion, compare pressure, brush choice, or one optional base layer while keeping the other conditions as similar as practical.
| Change to compare | Keep similar | What to observe |
|---|---|---|
| Less shadow in the first layer | Shade, base, brush, placement | Whether the initial deposit is more even and easier to build |
| Lighter blending pressure | Product amount, base, brush | Whether color stays in the intended area |
| A different suitable brush | Shade, base, amount, placement | Whether control improves in that specific area |
| One optional base layer | Shadow, brush, application method | Whether pickup, movement, or adhesion changes |
Compare in similar lighting and note the specific area that improved. This is personal troubleshooting, not a standardized test or a way to identify an ingredient as the cause.
If one shade repeatedly causes difficulty while others work in the same routine, consider whether it suits the result and technique you want. That observation is useful when deciding what to use next, but one attempt does not establish that a formula is defective. A replacement should address a clear need, rather than rely on price as a guarantee of better blending.
6. What Beauty Brands Should Check in Eyeshadow Samples
For a brand, “highly pigmented” is an incomplete description of application performance. A sample can deliver strong initial color while still requiring careful placement or offering limited flexibility during blending.
A practical comparison should record color payoff, evenness, edge diffusion, and buildability separately. Note the base, brush, pickup method, and application conditions so that feedback refers to a repeatable task. Compare light and deep shades and different finishes individually instead of letting one smooth shade represent a whole palette.
Pay attention to what happens when a second layer is added. Does it deepen the intended area without disturbing the first layer? Can the edge be softened while retaining the original shape? These are useful development questions, not a substitute for a defined professional test protocol.
Specific feedback helps a supplier investigate. “The outer corner becomes darker in spots after a second layer over this base” gives more direction than “the palette does not blend.” Photos taken in consistent light can accompany the description, without being presented as laboratory evidence.
Doriff lists eyeshadow products and custom formulation services. For a development project, discuss the intended finish, application method, and sample evaluation conditions directly; those service pages do not establish the performance of an individual sample.
-

Holiday Glow Lip Gloss Trio
Read more -

Toasty Warm 12-Pan Eyeshadow Palette
Read more -

Forest Green 12-Pan Eyeshadow Palette
Read more -
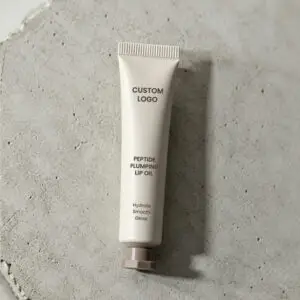
Minimalist Peptide Plumping Lip Oil
Read more -
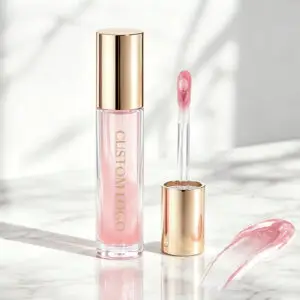
Luxury Peptide Plumping Lip Oil
Read more -
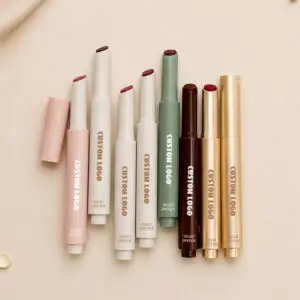
Velvet Lipstick Pen Personalization
Read more -
Beauty From Smooth Coverage Pressed Powder
Read more -
Beauty From Mirror Lip Gloss
Read more
7. Frequently Asked Questions
Q1:Why Does Eyeshadow Look Smooth on My Arm but Patchy on My Eyelids?
An arm swatch and an eye application compare different surfaces and often different methods. A concentrated finger swipe on an arm is not the same task as using a brush to build and diffuse color over a prepared, folding eyelid.
Swatches remain useful for looking at color and finish, but they do not replace application in the intended area. Consider both rather than treating either observation as a complete assessment.
Q2:Can You Fix Patchy Eyeshadow With a Damp Brush?
Sometimes damp application changes the result, but it is not a general fix for uneven shadow. Check whether the product permits wet use and follow the recommended method.
Temptalia’s matte tutorial cautions that introducing moisture can affect the pan surface. Do not assume that spraying a powder pan or dampening every matte will improve blending. A technique intended to intensify a reflective shade may not solve a patch in a matte gradient.
8. A More Even Blend Starts With the Right Adjustment
Eyeshadow looks more even when the adjustment matches the problem: soften a harsh boundary, place a little color into a small gap, or restart an area that no longer responds to gentle correction. For future applications, an even base, controlled layers, and lighter handling give you a useful starting point.
You do not have to keep blending until the color disappears. Observe the change, preserve the depth you wanted, and stop when the transition works for the look.
Developing an eyeshadow range? Share your target finishes, reference samples, and specific application feedback with Doriff to discuss your custom formulation project.