

A bronze powder, a bronze cream, and a bronze liquid can look similar in a swatch yet ask for quite different application techniques. Powder is a useful starting point for brush-led blending and layered color; cream can suit a quick wash applied with a fingertip or brush; liquid offers controlled placement, but some formulas leave less time to soften the edges before setting. None is automatically the longest-wearing or easiest option. The better choice fits the look you want, the way you apply makeup, and how the particular product wears on your lids.
1. Powder, Cream, and Liquid Eyeshadow at a Glance
Powder eyeshadow contains color in a dry format, commonly a pressed pan or loose powder. Cream eyeshadow has a spreadable consistency and may come in a pot, pan, or stick. Liquid eyeshadow flows more readily during application and often comes in a tube with an applicator. These are useful shopping categories, but hybrid products can sit between them.
Use the comparison below to identify what to try. It describes common application patterns rather than a performance ranking.
| What to compare | Powder eyeshadow | Cream eyeshadow | Liquid eyeshadow |
|---|---|---|---|
| Pickup and tools | Brushes offer different levels of pickup and diffusion; fingers can suit some shades | Fingers, brushes, or direct stick application, according to the product | Built-in applicator, then a fingertip or brush where instructed |
| Placing color | Sweep for a softer wash or press for concentrated placement | Spread or tap a small amount over the intended area | Place a small amount before extending the color |
| Softening edges | A clean blending brush helps control the boundary | Blend while the formula remains workable | Check setting speed; fast-setting products require prompt blending |
| Adding intensity | Add small amounts where more depth is needed | Check whether additional layers remain smooth | Follow instructions on whether the first layer should set before another |
| Useful tasks | Combining shades and shaping transitions | Quick single-shade looks and localized definition | Focused color placement or a wash, depending on formula and applicator |
| What to watch | Excess pickup, fallout, uneven adhesion, or fading | Buildup, movement, or creasing | Uneven edges, excessive thickness, or disturbance during layering |
The amount applied and the tool used can change the result considerably. A dense brush pressing shimmer onto the lid and a fluffy brush diffusing a matte shade are doing different jobs, even when both products are powders.
2. Formula, Format, and Finish Are Different Things
Where Eyeshadow Sticks and “Creamy Powders” Fit
A formula is the combination of ingredients that gives an eyeshadow its texture and performance; format describes its physical presentation, such as a pressed pan, pot, stick, or tube. An eyeshadow stick is a format, and many sticks contain cream formulas. For example, Bobbi Brown identifies its Long-Wear Cream Eyeshadow Stick as a cream product. A stick can make placement convenient, but its shape alone does not tell you how quickly it sets or how well it layers.
“Creamy” also appears in descriptions of powders. MAKE UP FOR EVER describes Artist Eyeshadow as having a creamy powder texture. In that context, the word describes the feel of a powder rather than turning it into a cream category. Read the product description and directions together instead of classifying it from one adjective.
Why Liquid Does Not Always Mean Shimmer
Finish is the appearance left on the lid: matte, satin, shimmer, or metallic, for example. It is separate from whether the product begins as powder, cream, or liquid. e.l.f. Liquid Velvet Eyeshadow is described by its manufacturer as a liquid-to-powder product with a soft-matte finish. A tube therefore does not automatically mean glitter or a glossy-looking result.
This distinction makes comparisons fairer. If you dislike visible sparkle, compare matte options across formats rather than dismissing every liquid shadow. If you want reflective color, inspect the finished effect instead of assuming that liquid will always look more metallic than powder.
-
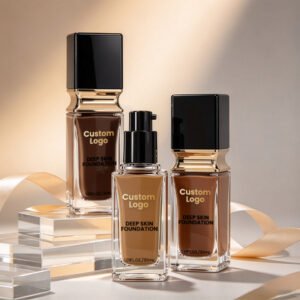
Private Label Liquid Foundation for Deep Skin Tones
Read more -
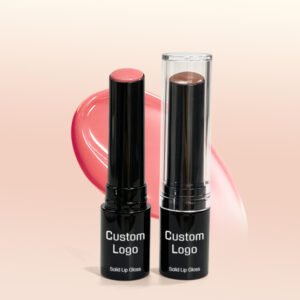
Private Label Solid Lip Gloss Stick
Read more -
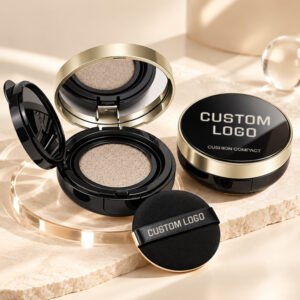
Private Label Cushion Foundation
Read more -
Private Label Liquid Concealer with Sponge Applicator
Read more -
Shimmer Cream Eyeshadow
Read more -
Private Label 2-in-1 Dual-Ended Mascara & Liquid Eyeliner
Read more -
Private Label Lip Mud
Read more -
Soft-Touch Liquid Blush
Read more
3. How the Formulas Behave During Application
Placing Color and Blending the Edges
Placing color and blending an edge are separate tasks. Placement puts pigment where you want the strongest effect; blending softens the transition into the surrounding skin or another shade. Trying to do both with a heavily loaded brush or applicator can spread more color than intended.
With powder, begin with a small pickup and build where needed. Pressing color onto the lid helps concentrate it, while a lighter sweeping motion can soften the boundary. With cream, spread or tap a thin amount into place, then work the perimeter while it remains movable. A cream that stays emollient and one that sets firmly will not offer the same working time.
For liquid, check the directions before applying a stripe across both lids. Urban Decay’s Glaze-On instructions, for example, advise starting with a small dot and blending immediately because that product sets quickly. For a product with those instructions, completing one lid before starting the other can be a practical way to keep control. That example does not establish a universal drying time for liquid eyeshadow.
A useful question is whether the edge becomes soft before the color stops moving. If it remains sharp, try a smaller amount over a smaller area before adding more product. Repeated rubbing after a setting formula has stopped moving may make the surface less even rather than more blended.
Building Intensity Without Disturbing the First Layer
Decide what you are trying to add: more depth at the outer corner, fuller coverage across the lid, or a reflective accent at the center. Each calls for a different placement. Covering the whole lid again to correct one pale spot can create unnecessary thickness elsewhere.
Add a small amount only where it is needed, using a gentle pressing or tapping motion when appropriate. Watch whether the new layer deposits cleanly or starts moving the color below. If the base shifts, stop adding product and reassess the amount, tool, and timing.
Some products explicitly call for letting one layer set before adding another. Glaze-On is one such example; its directions separate an initial sheer application from subsequent layering. Other formulas remain blendable for longer. Follow the product’s own sequence rather than assuming that every cream or liquid should be layered while wet—or only after drying.
3. How the Formulas Behave During Application
Placing Color and Blending the Edges
Placing color and blending an edge are separate tasks. Placement puts pigment where you want the strongest effect; blending softens the transition into the surrounding skin or another shade. Trying to do both with a heavily loaded brush or applicator can spread more color than intended.
With powder, begin with a small pickup and build where needed. Pressing color onto the lid helps concentrate it, while a lighter sweeping motion can soften the boundary. With cream, spread or tap a thin amount into place, then work the perimeter while it remains movable. A cream that stays emollient and one that sets firmly will not offer the same working time.
For liquid, check the directions before applying a stripe across both lids. Urban Decay’s Glaze-On instructions, for example, advise starting with a small dot and blending immediately because that product sets quickly. For a product with those instructions, completing one lid before starting the other can be a practical way to keep control. That example does not establish a universal drying time for liquid eyeshadow.
A useful question is whether the edge becomes soft before the color stops moving. If it remains sharp, try a smaller amount over a smaller area before adding more product. Repeated rubbing after a setting formula has stopped moving may make the surface less even rather than more blended.
Building Intensity Without Disturbing the First Layer
Decide what you are trying to add: more depth at the outer corner, fuller coverage across the lid, or a reflective accent at the center. Each calls for a different placement. Covering the whole lid again to correct one pale spot can create unnecessary thickness elsewhere.
Add a small amount only where it is needed, using a gentle pressing or tapping motion when appropriate. Watch whether the new layer deposits cleanly or starts moving the color below. If the base shifts, stop adding product and reassess the amount, tool, and timing.
Some products explicitly call for letting one layer set before adding another. Glaze-On is one such example; its directions separate an initial sheer application from subsequent layering. Other formulas remain blendable for longer. Follow the product’s own sequence rather than assuming that every cream or liquid should be layered while wet—or only after drying.
4. Choose by Your Routine and Check the Wear
Match the Formula to the Look You Want
Start with the task you repeat most often, then compare products that can accomplish it.
- For a quick single-shade look: A cream pot or stick can be convenient if you like fingertip application. A powder with one brush or a liquid with a manageable blending window can serve the same purpose. Judge how easily you finish both edges, not just the first swipe.
- For several shades and a gradual transition: Powder is a useful starting point for controlling where successive colors meet. If combining setting creams or liquids, check that you can blend adjoining colors before they become difficult to move.
- For a reflective accent: Compare the actual shimmer or metallic finish. Place a small amount where you want reflection instead of choosing solely by format.
- For carrying and touch-ups: Consider the tools needed, how securely the package closes, and whether a fresh layer looks smooth over worn makeup. Compact packaging alone does not guarantee an easy touch-up.
Imagine choosing a bronze shadow for weekday mornings. A dramatic arm swatch may attract attention, but the more relevant question is whether you can produce an even, comfortable layer at the intensity you actually wear. A product that looks excellent in a thick swatch may be less convenient for a thin wash.
Check Creasing, Transfer, and Texture on Your Own Lids
Different signs point to different problems. Creasing is color gathering along a fold. Transfer is color appearing on another area where the lid has made contact. Fading is a loss of visible intensity, while an uneven surface may show gaps or patches without obvious migration. Record what happens instead of describing every change as “poor staying power.”
For a practical comparison, use your normal preparation, apply a controlled amount, and inspect the makeup with your eyes relaxed and open as well as closed. Look again during the period you intend to wear it. Note where color moves, where it disappears, and whether a thicker area behaves differently from a thin one. If you change the primer, amount, and tool together, it becomes harder to tell which change helped.
An arm swatch helps you compare color and reflection, but it does not reproduce the folds and contact of your eyelids. Nor does a cream label guarantee comfort on dry-looking lids, or a powder label guarantee crease-free wear on oily ones. Kjaer Weis’s comparison discusses creasing with both textures and distinguishes setting creams from formulas that remain tacky. Use the product’s behavior on your own lids to refine your choice rather than selecting by age or skin-type labels alone.

5. Can You Use Powder, Cream, and Liquid Eyeshadow Together?
Yes, suitable products can be combined, but compatibility matters more than a fixed layering rule. One approach is a thin cream layer across the lid, with powder used selectively to deepen the crease or lash line. Kjaer Weis describes this kind of combination in its cream-and-powder guide. Keep the underlying layer light enough that the next product can be placed without dragging it around.
A liquid can also provide a localized accent over another shadow when its instructions allow that use. Try a small area first and watch what the applicator does to the base. If it pushes powder aside or leaves a raised boundary, adding a larger amount is unlikely to improve control. Use the product’s recommended tools and allow any instructed setting time.
Layering is useful when it achieves a specific effect, such as deeper definition or a different reflection. It is not automatically a route to longer wear. A cream shadow also should not be treated as a dedicated primer unless its directions support that role. Compare the layered result with the simpler version to decide whether the additional step earns its place in your routine.
6. For Brands: Compare the Formula and Applicator Together
For a beauty brand, “powder, cream, or liquid” is only the beginning of a development brief. Define the intended use first: a quick single-shade application, a blendable palette for several colors, or a concentrated reflective accent. That task helps determine which application properties matter and what kind of packaging supports them.
Evaluate the sample with the intended tool. A liquid that looks smooth when carefully spread with a separate brush still needs to be assessed with its proposed applicator. Likewise, a powder swatched by fingertip should also be examined with the type of brush the target customer is expected to use. Pickup, placement, blending, and layering form one connected experience.
| Evaluation area | What to record |
|---|---|
| Pickup and control | How much one normal pickup deposits, and whether that amount suits the intended area |
| Edge blending | Whether users can soften the boundary within the available working time |
| Second-layer application | Whether another layer adds color cleanly or moves, clumps, or disrupts the base |
| Wear observations | Creasing, transfer, fading, and unevenness recorded separately, with the preparation and wear conditions noted |
| Packaging and tool fit | Whether the applicator or recommended tool helps deliver a controlled amount |
This is a suggested sample-review framework, not a report of tests performed by Doriff. Keep observations separate from substantiated claims: an attractive swatch does not establish waterproof performance, a particular wear duration, or suitability for sensitive eyes. Those claims need evidence appropriate to the specific product and intended market.
Doriff’s eyeshadow range includes palettes and a metallic liquid eyeshadow set. Its custom formulation service also describes texture development. These pages provide starting points for a project discussion; the available formula, packaging, and supporting documentation should be confirmed for the proposed product.
7. Frequently Asked Questions
Q1:Can you use powder eyeshadow with a damp brush?
Only when the product’s directions support it. Urban Decay’s Gash eyeshadow instructions, for example, describe application with a dampened brush to increase intensity. That permission applies to that product, not every powder pan. Follow the recommended method rather than adding water directly to an eyeshadow pan.
Q2:Does every eyeshadow formula need the same primer?
No single primer routine should be assumed for all products. Check whether the eyeshadow is intended for bare lids, use over a separate primer, or use as a base itself. If you test a primer combination, keep the shadow amount and application method similar so you can judge whether the pairing improves the result. A good experience with one cream or liquid does not establish the best base for every product in that category.
8. Find the Formula That Fits How You Apply Makeup
Choose powder, cream, or liquid eyeshadow by the work you want it to do. Powder is a useful option for brush-led color placement and transitions; cream can suit a quick wash or direct application; liquid can offer convenient, focused placement when its working time fits your technique. The individual formula still determines how smoothly it layers and how it wears.
Start by comparing similar shades and finishes, apply the amount you would normally use, and check the result on your lids. That gives you a more relevant answer than choosing the most dramatic swatch or assuming that one category is always better.
Developing an eyeshadow collection for your brand? Share your target finish, reference samples, and packaging needs with Doriff to discuss a formulation brief and the options available for your project.